Building a Better Onboarding Flow in SwiftUI for iOS 18+
With iOS 26 now in beta and launching this fall, I decided to revisit how I build onboarding flows in SwiftUI. Like many indie developers, I typically support the latest iOS version along with the one before it. This allows me to take advantage of the modern features introduced in iOS 18 while also preparing for the new capabilities coming in iOS 26.
In this post, I’ll walk through a demo I built that shows how to create a smooth, structured onboarding flow using ScrollView instead of TabView. This approach gives me more control, cleaner logic, and a better overall user experience.
Why I Avoid TabView for Onboarding
Using a TabView for onboarding can be tempting, especially since it offers built-in pagination. But in practice, it introduces challenges that are hard to work around. Users can swipe freely between screens, which makes it difficult to enforce forward-only progression or implement skip logic. Handling validation or running logic before moving to the next screen is also tricky. These issues add complexity that I prefer to avoid in onboarding flows.
For a while, I used a ZStack approach instead. Each onboarding step was a separate view layered in the stack, and I controlled visibility using opacity and offset values. Transitions were handled with animation, and the structure gave me the control I needed for a guided experience. The setup worked well and served its purpose at the time.
Here’s an example of that structure:
ZStack {
    IntroPage(manager: manager)
        .opacity(intro.opacity)
        .offset(intro.offset)
    GroupsPage(manager: manager)
        .opacity(groups.opacity)
        .offset(groups.offset)
    SubscriptionPage(manager: manager)
        .opacity(subscription.opacity)
        .offset(subscription.offset)
    LocationPage(manager: manager, model: model)
        .opacity(location.opacity)
        .offset(location.offset)
}
.animation(.default, value: manager.selected)
This approach managed animations and transitions manually. It was effective, but it required tracking layout metrics, managing state updates, and coordinating animations across views.
Starting in iOS 17 and continuing in iOS 18, SwiftUI introduced features like ScrollPosition and improvements to ScrollView. These updates made the ZStack approach unnecessary for most onboarding flows. With a horizontal ScrollView, I can now programmatically move between screens, disable user swiping, and keep the code easier to maintain. It’s a cleaner solution that fits better with modern SwiftUI architecture.
Presenting Onboarding as an Overlay
In the demo, I present the onboarding flow using .overlay. This allows me to display onboarding screens on top of the main app interface without disrupting the layout or navigation stack.
Here’s why I prefer this approach:
- The main app stays loaded underneath
- Animations feel smooth and natural
- Safe areas and device orientation are handled automatically
- I can dismiss onboarding cleanly when finished
I’ve used fullScreenCover in the past, and while it’s a valid option, customizing its presentation and animations can be limiting.
How the OnboardingView Works
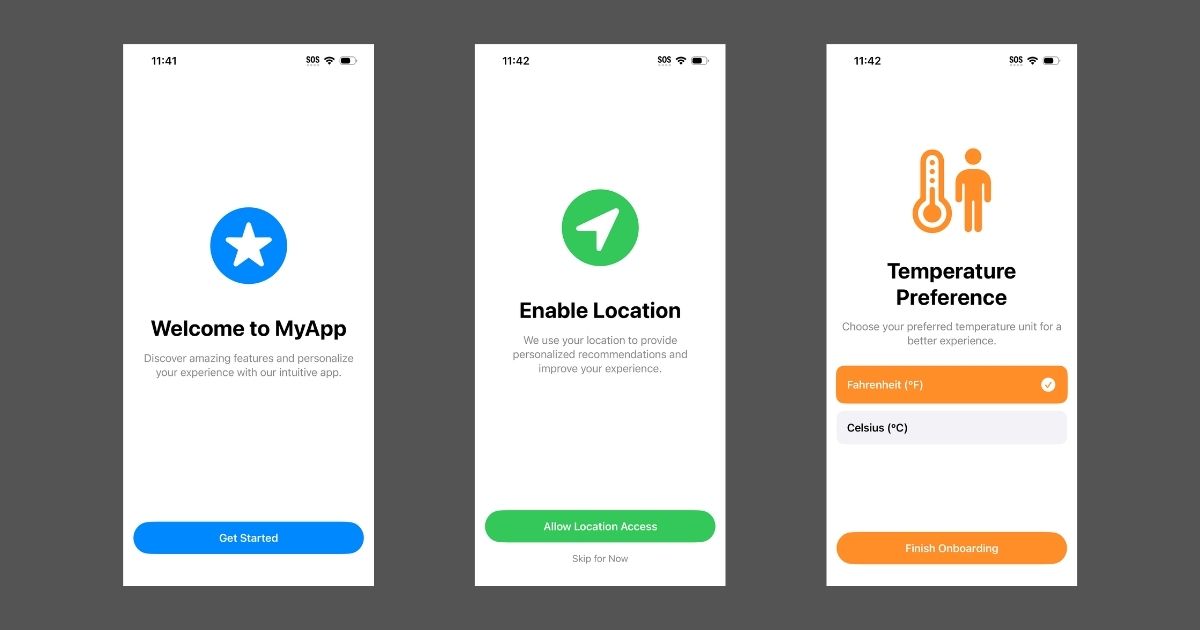
The core of the demo is the OnboardingView, which uses a horizontal ScrollView to manage a sequence of onboarding steps. Each page is tied to a case in the OnboardingPage enum, giving the flow a clear structure and making it easy to add or remove steps later.
OnboardingPage Enum
The enum defines the order and identity of each step. It’s flexible and easy to extend.
enum OnboardingPage: String, Identifiable, CaseIterable {
    case welcome
    case location
    case userInput

    var id: String { rawValue }

    static var first: Self = .welcome
}
You can add more pages depending on your app’s needs. Common examples include permission prompts, user profile setup, or subscription offers.
Scroll-Based Onboarding Container
The main OnboardingView uses a horizontal ScrollView and disables user interaction to prevent swiping between pages. Progression is handled entirely through programmatic navigation.
struct OnboardingView: View {
    @Binding var isOnboardingVisible: Bool

    private let pages = OnboardingPage.allCases
    @State private var position: ScrollPosition = .init(idType: OnboardingPage.ID.self)

    var body: some View {
        ScrollView(.horizontal) {
            ForEach(pages) { page in
                switch page {
                case .welcome:
                    WelcomePage(onComplete: welcomeComplete)
                case .location:
                    LocationPage(onComplete: locationComplete)
                case .userInput:
                    UserInputPage(onComplete: userInputComplete)
                }
            }
            .containerRelativeFrame([.horizontal])
            .scrollTargetLayout()
        }
        .scrollPosition($position)
        .scrollTargetBehavior(.viewAligned)
        .scrollIndicators(.hidden)
        .scrollDisabled(true)
        .onAppear {
            // Ensure the onboarding starts at the first page.
            // If not set explicitly, position may be undefined.
            position.scrollTo(id: OnboardingPage.first.id)
        }
    }
}
Each screen is responsible for its own completion logic and triggers the transition to the next step using a callback.
Completion Handlers and Navigation
Each page defines its own completion handler, allowing the onboarding flow to progress step by step.
func welcomeComplete() {
    scrollToPage(.location)
}

func locationComplete(isAuthorized: Bool) {
    scrollToPage(.userInput)
}

func userInputComplete(temperatureUnit: UserInputPage.TemperatureUnit) {
    withAnimation {
        isOnboardingVisible = false
    }
}
Preferences can be stored in UserDefaults, a custom PreferencesManager, or a shared model. Whatever best fits your app architecture.
Programmatic Scrolling
Transitions between steps are handled programmatically using scroll position:
private func scrollToPage(_ page: OnboardingPage) {
    withAnimation {
        position.scrollTo(id: page.id)
    }
}
This allows for full control over flow logic and supports conditional navigation, like skipping screens when appropriate.
Taking Advantage of iOS 18 and iOS 26 Features
This project uses several SwiftUI APIs introduced in iOS 18 that improve onboarding flows:
ScrollPositionlets you programmatically navigate between viewscontainerRelativeFrame([.horizontal])ensures each page fills the available space and adapts to device sizescrollTargetLayout()prepares the layout to align with scroll targetsscrollTargetBehavior(.viewAligned)makes each scroll snap cleanly to the next view
These tools make onboarding logic easier to control and more predictable. With iOS 26 coming soon, this setup is future-proof and ready for new layout and animation capabilities.
Common Screens You Can Add
This structure is easy to extend with additional screens for permissions, preferences, or monetization.
Permission screens might request access to notifications, camera, microphone, HealthKit, contacts, or photos. Ideally shown when the value is clear. Preference screens could include display options, fitness goals, interests, dietary needs, or notification frequency.
You can also add business-related steps such as subscriptions, paywalls, or free trial offers. Each screen stays modular and communicates through a completion callback, making the flow easy to manage and customize.
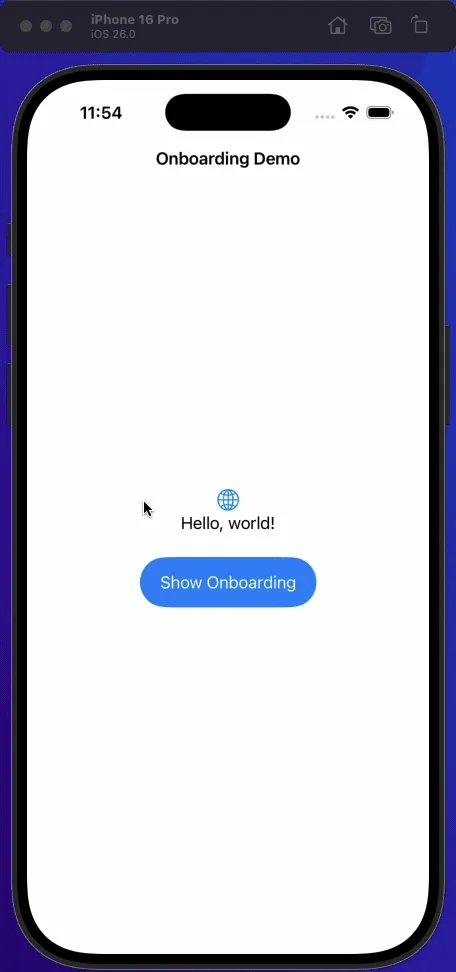
Try the Demo
You can download the complete project here to explore the code and test the onboarding flow in action. The implementation is modular and easy to adapt to a wide range of app types.
This is not a full onboarding framework. It’s a focused example that demonstrates a repeatable solution for building flexible, controlled onboarding flows in SwiftUI. If you’re working on something similar, this approach can save time and help you deliver a smoother experience for new users.
Final Thoughts
Onboarding is one of the first impressions your app makes. I built this demo to show how to make that experience smooth, structured, and maintainable using modern SwiftUI tools.
If you’re building a new iOS app or need help improving your onboarding flow, feel free to reach out. This pattern is lightweight, flexible, and ready for production use.